วันพุธที่ 12 พฤษภาคม พ.ศ. 2553
DWM-652
>>> DWM-652 is not supported in Win 7
This device has been discontinued and there will be no more further maintanance.
So Windows 7 will not be supported.
-------------------------------------------------
This device has been discontinued and there will be no more further maintanance.
So Windows 7 will not be supported.
-------------------------------------------------
DWL-G700AP
>>> DWL-G700AP How do I configure repeater mode on DWL-G700AP?
Step 1 Connect your DWL-G700AP using the UTP ( network ) cable.
Step 2 Launch your web browser, enter the IP address of DWL-G700AP (default is 192.168.0.50) and press Enter.
Step 3 Enter the username (“admin” by default) and your password (blank by default). Click OK to enter the web-based configuration for the device.
Step 4 You will see a DWL-G700AP configuration page shown as below
A) Click on Home.
B) Click on Wireless
C) Choose Repeater under Mode.
D) Click on Site Survey to search for the Access Point, which you want to connect to and repeat the signal.
Step 5 Select the AP which you want to connect to. Click on Connect button at the bottom of this small window.
Step 6 Please note that Repeater’s SSID, Channel and wireless security must be the same with AP1 (Access Point or Wireless Router).
Step 7 Click on Apply to complete the setup.
-------------------------------------------------
>>> DWL-G700AP How to set Access point (WEP)?
Step 1 Connect the DWL-2100AP to your PC using an Ethernet cable.
Step 2 Your computer will need to be in the same IP address range as the DWL-2100AP for configuration. The default IP address is 192.168.0.50.
Step 3 Open a web browser and enter in the IP address of the access point (192.168.0.50). The username is admin (all lower case) and the password is blank (nothing).
Step 4 Click on Home at the top and then click Wireless on the left side.
Step 5 Security: Select WEP.
Authentication: Select Open System to communicate the key across the
network. Select Shared Key to limit communication only to those devices that
share the same WEP settings.
WEP Encryption: Select 64-bit or 128-bit WEP encryption.
Key Type: Select Hexadecimal or ASCII key type
Keys 1-4: Input up to four encryption keys. You will select one of these to be
the active key.
Step 6 Click Apply to apply the changes.
Step 7 Click Tools >> System >> Save & Reboot
-------------------------------------------------
>>> DWL-G700AP How to upgrade the firmware of the DWL-G700AP
Step 1 Download the firmware and save the file to your computer. Do not try to run or launch the
file - it will not work.
Please go to the following URL to download the firmware : -
http://www.dlink.in.th/products/support.asp?pid=383#firmware
Step 2 Connect your DWL-G700AP using the UTP ( network ) cable.
There are two ways to do it :
a) PC connects to DWL-G700AP directly:
b) PC and DWL-G700AP connect to router:
Step 3 Launch your web browser, enter the IP address of DWL-G700AP (default is 192.168.0.50)
and press Enter.
Step 4 Enter the username (“admin” by default) and your password (blank by default). Click OK
to enter the web-based configuration for the device.
Step 5
A) Click on “Tools”
B) Click on “Firmware”
C) Under Firmware Upgrade click on the “Browse” button and browse to the .bin file you
downloaded in Step 1. Highlight the file by clicking on it once and click Open. (File name should
be : - DWL-G700AP_repeater_beta_210r14_0330.bin)
D) Click Apply. It will take 1 or 2 minutes for the upgrade to complete. Click on the Continue
button
Step 6 After the access point reboots, close your web browser. Please do a hard reset on the
Access Point after it rebooted. To do this, press and hold the Reset button which located at the
back of the Access point for 7 seconds, please make sure the Access point is power on while you
are resetting the Access point.
Step 7 At this point, your DWL-G700AP will be reset to default. The IP Address of the DWLG700AP
will be 192.168.0.50. If the IP Address is not in the same range as your network, you will
need to configure your network card to a static IP Address in order to configure the DWL-
G700AP. Please refer to Part 2 of this manual for configuring a static IP Address on your network
card.
-------------------------------------------------
DWL-G510
>>> DWL-G510 How do I install the DWL-G510/DWL-G630?
Step 1 Insert the installation CD of DWL-G510/DWL-G630 in your CD-ROM drive. Setup will be launched automatically.
Step 2 Click Install Driver.
Step 3 Please wait while InstallShield? Wizard prepares for setup.
Step 4 Click Next
Step 5 Default setup will install to : Local Disk:\Program Files\D-Link AirPlus G, where Local Disk represents the drive letter of your hard drive.
To install to a different location click Browse and specify the location. Click Next.
Step 6 Setup will now install.
Step 7 When setup is completed Select No, I will restart... and then click Finish, and shut down your computer manually.
Step 8 Once off, insert the DWL-G510 into a PCI slot on your computer or DWL-G630 into a PCMCIA slot on your laptop. Power on your computer. Once rebooted, the drivers will install automatically.
Step 9 The two notifications below will popup in the system tray (the area by the clock in the lower right hand side of the screen):
Step 10 Next, the Found New Hardware Wizard window will appear. Select Install the software automatically (Recommended) using the radio buttons and then click Next.
Step 11 The Please wait while the wizard searches... window will appear.
Step 12 If the Device has not passes Windows? logo testing window appears click Continue Anyway.
Step 13 The Please wait while the wizard installs the software window will appear.
Step 14 Click Finish. Your adapter is now installed.
------------------------------------------------
DWL-G630
>>> DWL-G630 How do I install the DWL-G510/DWL-G630?
Step 1 Insert the installation CD of DWL-G510/DWL-G630 in your CD-ROM drive. Setup will be launched automatically.
Step 2 Click Install Driver.
Step 3 Please wait while InstallShield? Wizard prepares for setup.
Step 4 Click Next
Step 5 Default setup will install to : Local Disk:\Program Files\D-Link AirPlus G, where Local Disk represents the drive letter of your hard drive.
To install to a different location click Browse and specify the location. Click Next.
Step 6 Setup will now install.
Step 7 When setup is completed Select No, I will restart... and then click Finish, and shut down your computer manually.
Step 8 Once off, insert the DWL-G510 into a PCI slot on your computer or DWL-G630 into a PCMCIA slot on your laptop. Power on your computer. Once rebooted, the drivers will install automatically.
Step 9 The two notifications below will popup in the system tray (the area by the clock in the lower right hand side of the screen):
Step 10 Next, the Found New Hardware Wizard window will appear. Select Install the software automatically (Recommended) using the radio buttons and then click Next.
Step 11 The Please wait while the wizard searches... window will appear.
Step 12 If the Device has not passes Windows? logo testing window appears click Continue Anyway.
Step 13 The Please wait while the wizard installs the software window will appear.
Step 14 Click Finish. Your adapter is now installed.
-------------------------------------------------
DWL-G122
>>> DWL-G122 How to configure key in WEP/WPA-PSK in my Dlink Utility.
Step 1: Log into the D-Link utility by double-clicking on the TV or green D icon in the system tray (next to the clock).
Step 2: Clicks on Site Survey.
Step 3: Under the available network, select your own SSID and double click it.
Step 4: Double check that the SSID is correctly set.
Step 5: Data Encryption select Enable.
Step 6: Authentication select Open if you are setting WEP on the Router or select WPA-PSK if the Router is set as WPA-PSK.
Step7: Select the appropriate Key length which has to be match with the router settings.
Step8: Specify the correct encryption settings and encryption key.
Step9: Click on the Apply button to save the changes.
-------------------------------------------------
>>> Problem - No light on the DWL-G122
Troubleshooting Steps:
A. Uninstall the driver and reinstall the driver.
B. Install the device on another computer and check if the device is still functioning.
C. RMA
-------------------------------------------------
>>> Problem - Can’t see any SSID under available network.
Troubleshooting Steps:
1. Uninstall the driver and reinstall the driver.
2. Verify that the Link and the Act light is blinking.
3. Check the driver, please install the latest.
4. Make sure the router wireless network wireless signal is Enable.
5. Use the Dlink Utility to scan for the available network.
6. Place the device near to the router. And try again.
7. Try to use WZC (window to scan and configure for the wireless network)instead of using the Dlink utility.
8. Make sure that Firewall and other internet security application is OFF.
9. There should not have two wireless network card installed in a single computer. Please uninstall the previous driver.
10. Try this device at the hotspot to verify if the device is faulty or not.
11. RMA.
-------------------------------------------------
>>> Problem - Why I can’t see the D icon on my taskbar, so I can’t follow the instructions to configure my adaptor.
Troubleshooting Steps:
A. Please ensure that the driver is installed before plug in the device.
B. Please try another USB port or another computer.
C. Please ensure user is using the latest driver.
D. Try to disable Window Zero Configuration page.
Step 1: Click on Start and right-click on My Computer. Select Manage.
Step 2: In the left pane, double-click on Services and Applications. Select Services.
Step 3: In the right pane, scroll down and double-click on Wireless Zero Configuration to open the properties window.
Step 4: In the properties window, click on the General tab at the top. Next to Startup Type, click the down arrow and select Disabled. This will prevent the utility from running when you reboot your computer. Under Service Status, click Stop. Click OK to close the properties window.
Step 5: Please restart your PC. And you should be able to see the “D” icon (or Bar Chart depends on the wireless adapter model you have).
E. RMA.
-------------------------------------------------
DWL-3500AP
***NOTE: Please take note that our DWL-3500AP and DWL-8500AP doesn't support WDS,
WDS+AP or Repeater.
-------------------------------------------------
WDS+AP or Repeater.
-------------------------------------------------
DWL-3200AP
>>> DWL-3200AP Basic/Installation Configuration
((( Fix ip address )))
Advise Step by Step
Please connect by lan cable and Fixed IP address
IP 192.168.0.51 ,Subnet Mask 255.255.255.0 ,Gateway 192.168.0.50
After configuration , change ip address is Obtain ip address an automatically.
------------------------------------------------
After login Goto Home > Basic Settings > Wireless
Wireless Band: IEEE 802.11g
Mode: Access Point is selected from the pull-down menu.
SSID: Service Set Identifier (SSID) is the name designated for a specific wireless local area network (WLAN). The SSID’s factory default setting is dlink. The SSID can be easily changed to connect to an existing wireless network or to establish a new wireless network. The SSID can be up to 32 characters and is case-sensitive.
SSID Broadcast: Enable or Disable SSID broadcast. Enabling this feature broadcasts the SSID across the network.
Channel: Auto Channel Scan is set by default. All devices on the network must share the same channel. To change the channel, uncheck Auto Channel Scan. (Note: The wireless adapters will automatically scan and match the wireless setting.)
Auto Channel Scan: Select Enable or Disable. (Enable this feature to auto-select the channel for best wireless performance.)
Authentication: Open System
Shared Key
Open System/Shared Key
WPA-Enterprise
WPA-Personal
WPA2-Enterprise
WPA2-Personal
WPA-Auto-Enterprise
WPA-Auto-Personal
Home > Basic Settings > Wireless (continued)
Select Open System to communicate the key across the network.
Select Shared Key to limit communication to only those devices that share the same WEP settings.
Select Open System/Shared Key to allow either form of data encryption.
Select WPA-Enterprise, WPA2-Enterprise, WPA-Auto-Enterprise to secure your network with the inclusion of a RADIUS server.
Select WPA-Personal, WPA2-Personal, WPA-Auto-Personal to secure your network using a password and dynamic key changes. (No RADIUS server required).
Encryption: Select Disabled or Enabled. (Disabled is selected here).
Key Type*: Select HEX or ASCII.
Key Size:Select 64-, 128-, 152-bits.
Valid Key: Select the 1st through the 4th key to be the active key.
First through Fourth keys: Input up to four keys for encryption. You will select one of these keys in the valid key field.
*Hexadecimal digits consist of the numbers 0-9 and the letters A-F
*ASCII (American Standard Code for Information Interchange) is a code for representing English letters as numbers from 0-127
-------------------------------------------------
>>> DWL-3200AP How to configuration WDS Mode?
1. Connect your PC to the LAN port of your DWL-3200AP.
2. Start up a Internet explorer and key in 192.168.0.50 (by default)
3. Enter the Username: "admin" , Password: ""
4. Click on the Home tab.
5. Select Basic settings >> wireless
6. Select Mode is WDS.
7.Fill remote AP MAC Address and scan wireless signal.
8. Select Authentication follow assigned router.
9. Select Encryption is Enable.
10. Select Ket type is HEX.
11. Select Key size is 64Bits
12. Fill password in Firstkey follow assigned router.
13. Click Apply button below.
---------------------------------------------------------
***NOTE: Please take note that our DWL-3200AP can support the following modes like
AP, WDS , WDS+AP
---------------------------------------------------------
DWL-2100AP
>>> DWL-2100AP How to set Access point (WEP)?
Step 1 Connect the DWL-2100AP to your PC using an Ethernet cable.
Step 2 Your computer will need to be in the same IP address range as the DWL-2100AP for configuration. The default IP address is 192.168.0.50.
Please connect by lan cable and Fixed IP address
IP 192.168.0.51 ,Subnet Mask 255.255.255.0 ,Gateway 192.168.0.50
*** Note : After configuration , change ip address is Obtain ip address an automatically.
Step 3 Open a web browser and enter in the IP address of the access point (192.168.0.50). The username is admin (all lower case) and the password is blank (nothing).
Step 4 Click on Home at the top and then click Wireless on the left side.
>>> Access Point (WEP)
Wireless Band: IEEE 802.11g.
Mode: Access Point is selected from the drop-down menu.
SSID: Service Set Identifier (SSID) is the name designated for a specific wireless local area network (WLAN). The SSID’s factory default setting is dlink. The SSID can be easily changed to connect to an existing wireless network or to establish a new wireless network.
SSID Broadcast: Enable or Disable SSID broadcast. Enabling this feature broadcasts the SSID across the network.
Channel: Auto Channel Scan is enabled by default. All devices on the network must share the same channel.
Radio Frequency: The radio frequency will vary depending on the wireless channel that is chosen. The frequency in channel 6 is 2.437GHz.
Auto Channel Scan: Select Enable or Disable. Enable this feature to auto-select the channel for best wireless performance.
Authentication: Select Open System to communicate the key across the network.
Select Shared Key to limit communication to only those devices that share the same WEP settings.
Select Open System/Shared Key to allow either form of data encryption.
Select WPA-EAP to secure your network with the inclusion of a RADIUS server.
Select WPA-PSK to secure your network using a password and dynamic key changes (No RADIUS server required).
Select WPA2-EAP to secure your network with the inclusion of a RADIUS server and upgrade the encryption of data with the Advanced Encryption Standard (AES).
Select WPA2-PSK to secure your network using a password and dynamic key changes. No RADIUS server required and encryption of data is upgraded with the Advanced Encryption Standard (AES).
Select WPA-Auto-EAP to allow the client to either use WPA-EAP or WPA2-EAP.
Select WPA-Auto-PSK to allow the client to either use WPA-PSK or WPA2-PSK.
Super G Mode: Disabled by default. You can select Super G without Turbo or Super G with Dynamic Turbo.
Encryption: Select Disabled or Enabled. (Disabled is selected here).
Key Type: Select HEX or ASCII.
Key Size: Select 64-bit, 128-bit, or 152 bits.
Valid Key: Select the 1st through the 4th key to be the active key.
First through Fourth keys: Input up to four keys for encryption. You will select one of these keys in the valid key field.
Step 5 Click Tool >> System
Step 6 Click restart button
-------------------------------------------------
>>> DWL-2100AP Repeater Mode Configuration
Step 1 Connect the DWL-2100AP to your PC using an Ethernet cable.
Step 2 Your computer will need to be in the same IP address range as the DWL-2100AP for configuration. The default IP address is 192.168.0.50.
Step 3 Open a web browser and enter in the IP address of the access point (192.168.0.50). The username is admin (all lower case) and the password is blank (nothing).
Step 4 Click on Advanced at the top and then click Mode on the left side.
Step 5 Select "AP Repeater mode"
Step 6 AP Repeater will allow you to repeat the wireless signal of the root AP. Click to enable and enter the MAC address of the root AP.
Step 7 Click Apply
Step 8 Click on Tools at the top and then click System on the left side.
Step 9 Click Restart button.
-------------------------------------------------
>>> DWL-2100AP How to connect DWL-2100AP as Client Mode?
Step 1 Connect the D-Link Access Point directly to the PC via an Ethernet cable. One end to LAN port of the Access Point and the other end to the Ethernet port of you PC.
Step 2 Set you PC to Static IP. This can be done under Control Panel > Network Connections > Local Area Connection > Properties > Internet Protocol (TCP/IP) > Properties.
-Right-click on the Local Area Connection which represents your network card and select Properties.
-Highlight Internet Protocol (TCP/IP) and click Properties.
-Click Use the following IP address and enter an IP address that is on the same subnet as the LAN IP address on your D-Link Access
IP Address: 192.168.0.52, Subnet mask: 255.255.255.0
You don’t have to key in any Default gateway or DNS server address.
-Click OK twice. You may be asked if you want to reboot your computer. Click Yes.
Step 3 Launch your IE (Internet explorer) and key in 192.168.0.50 in the address column and press enter.
Step 4 Enter your Username: admin and no password (if it is default) click on OK
Step 5 Click on the Home tab and then click on Wireless to the left.
Step 6 Select “AP Client” on Mode.
Step 7 Click on the Scan button to Scan for the SSID of your wireless router/ access point.
Please make sure that the SSID and Channel is Same from you D-Link AP or Router. (If you have set wireless security such as WEP in the AP or router, you also need to set the same WEP on the Access Point)
Please key in the MAC Address of the Main AP to the “Root AP MAC Address”
Step 7 Click on Apply then click Continue to save the settings.
Step 8 Click on the Home tab and then click on LAN to the left
Change the IP Address of the D-Link Access Point so that it will be in the same subnet as you main Router (example: 192.168.1.51) and subnet mask (example:255.255.255.0) accordingly. Default Gateway has to be your main router’s IP address.
Step 9 Click on Apply then click Continue to save the settings.
Step 10 After you have done the above, please disconnect the D-Link Access Point from your PC and connect to the main router.
Step 11 Please make sure that you connect the D-Link Access Point to the LAN port of your computer or the device you want to use.
Step 12 Please put you PC back to automatically obtain IP address.This can be done under Control Panel > Network Connections > Local Area Connection > Properties > Internet Protocol (TCP/IP) > Properties.
-Right-click on the Local Area Connection which represents your network card and select Properties.
-Highlight Internet Protocol (TCP/IP) and click Properties.
-Click Obtain an IP address Automatically and click on Obtain DNS server address automatically.
-Click OK twice. You may be asked if you want to reboot your computer. Click Yes.
-------------------------------------------------
Step 1 Connect the DWL-2100AP to your PC using an Ethernet cable.
Step 2 Your computer will need to be in the same IP address range as the DWL-2100AP for configuration. The default IP address is 192.168.0.50.
Please connect by lan cable and Fixed IP address
IP 192.168.0.51 ,Subnet Mask 255.255.255.0 ,Gateway 192.168.0.50
*** Note : After configuration , change ip address is Obtain ip address an automatically.
Step 3 Open a web browser and enter in the IP address of the access point (192.168.0.50). The username is admin (all lower case) and the password is blank (nothing).
Step 4 Click on Home at the top and then click Wireless on the left side.
>>> Access Point (WEP)
Wireless Band: IEEE 802.11g.
Mode: Access Point is selected from the drop-down menu.
SSID: Service Set Identifier (SSID) is the name designated for a specific wireless local area network (WLAN). The SSID’s factory default setting is dlink. The SSID can be easily changed to connect to an existing wireless network or to establish a new wireless network.
SSID Broadcast: Enable or Disable SSID broadcast. Enabling this feature broadcasts the SSID across the network.
Channel: Auto Channel Scan is enabled by default. All devices on the network must share the same channel.
Radio Frequency: The radio frequency will vary depending on the wireless channel that is chosen. The frequency in channel 6 is 2.437GHz.
Auto Channel Scan: Select Enable or Disable. Enable this feature to auto-select the channel for best wireless performance.
Authentication: Select Open System to communicate the key across the network.
Select Shared Key to limit communication to only those devices that share the same WEP settings.
Select Open System/Shared Key to allow either form of data encryption.
Select WPA-EAP to secure your network with the inclusion of a RADIUS server.
Select WPA-PSK to secure your network using a password and dynamic key changes (No RADIUS server required).
Select WPA2-EAP to secure your network with the inclusion of a RADIUS server and upgrade the encryption of data with the Advanced Encryption Standard (AES).
Select WPA2-PSK to secure your network using a password and dynamic key changes. No RADIUS server required and encryption of data is upgraded with the Advanced Encryption Standard (AES).
Select WPA-Auto-EAP to allow the client to either use WPA-EAP or WPA2-EAP.
Select WPA-Auto-PSK to allow the client to either use WPA-PSK or WPA2-PSK.
Super G Mode: Disabled by default. You can select Super G without Turbo or Super G with Dynamic Turbo.
Encryption: Select Disabled or Enabled. (Disabled is selected here).
Key Type: Select HEX or ASCII.
Key Size: Select 64-bit, 128-bit, or 152 bits.
Valid Key: Select the 1st through the 4th key to be the active key.
First through Fourth keys: Input up to four keys for encryption. You will select one of these keys in the valid key field.
Step 5 Click Tool >> System
Step 6 Click restart button
-------------------------------------------------
>>> DWL-2100AP Repeater Mode Configuration
Step 1 Connect the DWL-2100AP to your PC using an Ethernet cable.
Step 2 Your computer will need to be in the same IP address range as the DWL-2100AP for configuration. The default IP address is 192.168.0.50.
Step 3 Open a web browser and enter in the IP address of the access point (192.168.0.50). The username is admin (all lower case) and the password is blank (nothing).
Step 4 Click on Advanced at the top and then click Mode on the left side.
Step 5 Select "AP Repeater mode"
Step 6 AP Repeater will allow you to repeat the wireless signal of the root AP. Click to enable and enter the MAC address of the root AP.
Step 7 Click Apply
Step 8 Click on Tools at the top and then click System on the left side.
Step 9 Click Restart button.
-------------------------------------------------
>>> DWL-2100AP How to connect DWL-2100AP as Client Mode?
Step 1 Connect the D-Link Access Point directly to the PC via an Ethernet cable. One end to LAN port of the Access Point and the other end to the Ethernet port of you PC.
Step 2 Set you PC to Static IP. This can be done under Control Panel > Network Connections > Local Area Connection > Properties > Internet Protocol (TCP/IP) > Properties.
-Right-click on the Local Area Connection which represents your network card and select Properties.
-Highlight Internet Protocol (TCP/IP) and click Properties.
-Click Use the following IP address and enter an IP address that is on the same subnet as the LAN IP address on your D-Link Access
IP Address: 192.168.0.52, Subnet mask: 255.255.255.0
You don’t have to key in any Default gateway or DNS server address.
-Click OK twice. You may be asked if you want to reboot your computer. Click Yes.
Step 3 Launch your IE (Internet explorer) and key in 192.168.0.50 in the address column and press enter.
Step 4 Enter your Username: admin and no password (if it is default) click on OK
Step 5 Click on the Home tab and then click on Wireless to the left.
Step 6 Select “AP Client” on Mode.
Step 7 Click on the Scan button to Scan for the SSID of your wireless router/ access point.
Please make sure that the SSID and Channel is Same from you D-Link AP or Router. (If you have set wireless security such as WEP in the AP or router, you also need to set the same WEP on the Access Point)
Please key in the MAC Address of the Main AP to the “Root AP MAC Address”
Step 7 Click on Apply then click Continue to save the settings.
Step 8 Click on the Home tab and then click on LAN to the left
Change the IP Address of the D-Link Access Point so that it will be in the same subnet as you main Router (example: 192.168.1.51) and subnet mask (example:255.255.255.0) accordingly. Default Gateway has to be your main router’s IP address.
Step 9 Click on Apply then click Continue to save the settings.
Step 10 After you have done the above, please disconnect the D-Link Access Point from your PC and connect to the main router.
Step 11 Please make sure that you connect the D-Link Access Point to the LAN port of your computer or the device you want to use.
Step 12 Please put you PC back to automatically obtain IP address.This can be done under Control Panel > Network Connections > Local Area Connection > Properties > Internet Protocol (TCP/IP) > Properties.
-Right-click on the Local Area Connection which represents your network card and select Properties.
-Highlight Internet Protocol (TCP/IP) and click Properties.
-Click Obtain an IP address Automatically and click on Obtain DNS server address automatically.
-Click OK twice. You may be asked if you want to reboot your computer. Click Yes.
-------------------------------------------------
DWL-2000AP+
>>> DWL-2000AP+ How to setup DWL-2000AP+ on Repeater mode?
1) Plug the power cord to the DWL-2000AP+ and switch on your power socket
2) Use the network cable (included in the package) to connect to both PC/notebook and
DWL-2000AP+
3) After your have connected the network cable between DWL-2000AP+ and the
PC/notebook (powered up), you will notice that all the 3 LEDs are lit up on the front
panel of DWL-2000AP+
4) On your PC/notebook, click onto “Start” and click on “Control Panel”
5) Double-click onto “Network Connections”
6) Right-click onto “Local Area Connection” and click on “Properties”
7) Select “Internet Protocol (TCP/IP)” and click onto “Properties”
8) Select “Use the following IP address” and assign:
IP address: 192.168.0.51
Subnet mask: 255.255.255.0
Then click “Ok”
9) Close onto “Close” button
10) Double-click on Internet Explorer, and type in 192.168.0.50
Type in “admin” as Username and left it blank (nothing) for Password
11) If you need to change the IP address of your DWL-2000AP+, please click onto
“LAN” button under Home tab, and change according to suit your existing network
12) If you intend to enable the DHCP Server function (this feature allow DWL-2000AP+
to assign IP addresses to the PC/notebook automatically), please click onto “DHCP”
button under Home tab
13) By default, DWL-2000AP+ is in Access Point mode, you may change to other
available modes by clicking onto “Mode” button under Advanced tab
14) For the next few setup, you may require to check for the MAC address of the Access
Point or Wireless Router. For DWL-2000AP+’s MAC Address, it is being labelled at the
bottom of the AP
15) If you wish to setup DWL-2000AP+ to be repeater (to extend the wireless coverage
of a existing DWL-2000AP+/ DI-624+ / DI-724P+) , then click onto “Mode” button
under Advanced tab, select “Repeater”
16) After selecting the “Repeater” mode, type in the MAC address of the Access point/
wireless router that you wish to use the DWL-2000AP+ to repeat from. Please ensure that
both SSID and Channel are the same for both AP and repeater
-------------------------------------------------
DWL-2000AP
>>> DWL-2000AP How to setup DWL-2000AP on Client mode?
***NOTE: D-Link currently supports the DWL-2000AP connecting in client mode to another DWL-2000AP. The DWL-2000AP cannot be a client to other wireless routers or access points.
To configure the DWL-2000AP for Client mode follow the steps below:
Step 1 Log into the web based configuration by typing in the IP address of the DWL-2000AP (default:192.168.0.50) in your web browser. The username is admin (all lowercase) and the password is blank (nothing).
Step 2 Click on the Advanced tab and click on Mode.
Step 3 Select Client Mode and enter the Remote AP MAC. The remote AP MAC is the MAC address of the access point or wireless router you are connecting to.
***Note: Make sure when connecting to a wireless router, use the LAN or Ethernet MAC address, not the Wireless MAC address.
Step 4 Click the Apply button and click Continue to restart the DWL-2000AP.
-------------------------------------------------
DWA-510
>>> DWA-510 Basic Installation/ Configuration (CD-ROM)
Adapter Installation
Note: Please install the DWA-510 Desktop Adapter into your computer before installing the driver software from the D-Link CD.
Refer to the insert included with this adapter for installation instructions.
Turn on the computer and Insert the D-Link DWA-510 Driver CD in the CD-ROM drive. The step-by-step instructions that follow are
shown in Windows XP. The steps and screens are similar for the other Windows operating systems.
If the CD Autorun function does not automatically start on your computer, go to Start > Run. In the run box type “D:\Drivers\setup.
exe” (where D: represents the drive letter of your CD-ROM drive).
Step1.click Install Drivers.
Step2.Click Next to continue.
Step3.By default setup will install to the default location: C:\Program
Files\Wireless G DWA-510, where C: represents the drive letter
of your hard drive. To install to a different location click Browse and
specify the location. Click Next.
Step4.Select the Program Files folder location. Click Next to continue.
Step5.Click Next
Step6.Click Finish and shut down your computer. Next, insert your desktop adapter
and then restart your system.
Step7.Enter the network name (SSID) manually. If you enter the SSID incorrectly, you
will automatically be brought to the site survey page.
Click Next to continue or click Scan to display the site survey page.
Step8.Click the Scan button to display a list of wireless networks (site survey). Click
on the network name (SSID) and click Next.
Step9.If the wireless network you are trying to connect to is encrypted, enter the WEP
key or WPA-PSK passphrase. Click Next to continue.
Step10.Click Finish to continue.
Configuration
This section will show you how to configure your new D-Link wireless adapter using the D-Link Utility as well as the Windows? XP
Zero Configuration Utility.
D-Link Configuration Utility
The D-Link DWA-510 uses the Configuration Utility as the management software. The utility provides the user an
easy interface to change any settings related to the wireless adapter. After you have completed the installation of the
DWA-510 and whenever you start the computer, the Configuration Utility starts automatically and the system tray icon is loaded in
the toolbar. Clicking on the utility icon will start the Configuration Utility.
Wireless Networks
The Wireless Networks (Site Survey) page will display all wireless networks that are available in your area. To connect to a network,
simply highlight the wireless network (SSID) and click Connect.
My Wireless Networks
The My Wireless Networks page will allow you to create, edit, and delete wireless network profiles. Every time you connect to a
network using the Wireless Networks page, a profile will automatically be created.
-------------------------------------------------
DWA-125
>>> DWA-125 How to install software DWA-125?
Software Installation
1.Turn on the computer and Insert the D-Link DWA-125 Driver CD in the CD-ROM drive. The step-by-step instructions that
follow are shown in Windows XP. The steps and screens are similar for the other Windows? operating systems.
2.Click Install Drivers.
If the CD Autorun function does not automatically start on your
computer, type “D:\Drivers\setup.exe”. If it does start, proceed to
the next screen.
3.The InstallShield Wizard window will appear.
Click Next to continue.
By default setup will install to the default location: C:\Program
Files\Rangebooster G DWA-125, where C: represents the
drive letter of your hard drive. To install to a different location
4.click Browse and specify the location. Click Next.
5.Select the Program Files folder location. Click Next to continue.
6.Insert the adapter into an available USB port on your computer.
Optional: If desired or necessary, attach the cradle between the
DWA-125 and your computer.
If the Found New Hardware Wizard appears, click Cancel.
Click Next to continue.
7.Enter the network name (SSID). If you enter the SSID incorrectly, you
will automatically be brought to the site survey page.
8.Click Next to continue or click Scan to display the site survey page.
9.Click the Scan button to display a list of wireless networks (site survey).
10.Click on the network name (SSID) and click Next.
If the wireless network you are trying to connect to is encrypted, enter
the WEP key or WPA-PSK passphrase. Click Next to continue.
11.Click Finish to exit the wizard.
***NOTE:Link product DWA-125 >>> http://www.dlink.co.th/products/?idproduct=418&idCategory=270
-----------------------------------------------------------
>>> DWA-125 Detail support Ubuntu
DWA-125 supports Ubuntu 9.04 : 2.6.28-11-generic, Fedora 11 : 2.6.29.4-167.fc11.i686.PAE and Mandriva 2009.1 (spring) : 2.6.29.1-desktop-mnb only.
Currently there is no D-Link wireless N adaptor that can support Ubuntu 9.10.
-----------------------------------------------------------
DWA-110
>>> DWA-110 How to install software DWA-110?
Software Installation
1.Turn on the computer and Insert the D-Link DWA-110 Driver CD in the CD-ROM drive. The step-by-step instructions that
follow are shown in Windows XP. The steps and screens are similar for the other Windows? operating systems.
2.Click Install Drivers.
If the CD Autorun function does not automatically start on your
computer, type “D:\Drivers\setup.exe”. If it does start, proceed to
the next screen.
3.The InstallShield Wizard window will appear.
Click Next to continue.
By default setup will install to the default location: C:\Program
Files\Rangebooster G DWA-110, where C: represents the
drive letter of your hard drive. To install to a different location
4.click Browse and specify the location. Click Next.
5.Select the Program Files folder location. Click Next to continue.
6.Insert the adapter into an available USB port on your computer.
Optional: If desired or necessary, attach the cradle between the
DWA-110 and your computer.
If the Found New Hardware Wizard appears, click Cancel.
Click Next to continue.
7.Enter the network name (SSID). If you enter the SSID incorrectly, you
will automatically be brought to the site survey page.
8.Click Next to continue or click Scan to display the site survey page.
9.Click the Scan button to display a list of wireless networks (site survey).
10.Click on the network name (SSID) and click Next.
If the wireless network you are trying to connect to is encrypted, enter
the WEP key or WPA-PSK passphrase. Click Next to continue.
11.Click Finish to exit the wizard.
-------------------------------------------------
DSL-2640BT
>>> DSL-2640BT :Wireless G ADSL2+ 4-Port Router
>>Ultimate Internet Connection
The DSL-2640BT wireless ADSL router is an affordable high-performance ADSL router for home and the small office. With integrated ADSL2/2+ supporting up to 24Mbps download speed, 802.11g wireless LAN, firewall protection, Quality of Service (QoS) and 4-port switch, this router provides all the essentials that a home or small office needs to establish a secure and high-speed remote link to the outside world.
>>Affordable High Speed Connection for Home & Small Office
Designed as a very affordable high-performance ADSL router for home and SOHO users, the DSL-2640BT provides not only the low-cost, high-speed Internet connection, but also the security and Quality of Service (QoS) required by users in todays high-risk and versatile Internet environments.
>>Ready Wired & Wireless LAN Connection
The DSL-2640BT provides an integrated 802.11g WLAN interface supporting wireless speeds of up to 54Mbps and interoperability with 802.11b wireless devices on the 2.4GHz frequency band. It also provides four 10/100Mbps Ethernet switch ports for ready workstations connection. These built-in functions save you the cost and trouble of installing a separate wireless access point and an Ethernet switch.
>>Firewall Protection & QoS
Security features prevents unauthorized access to the home and office network from Internet intruders. The router provides firewall security using Stateful Packet Inspection (SPI) and Denial of Service (DoS) attack protection. SPI inspects the contents of all incoming packet headers before deciding what packets are allowed to pass through. Router access control is provided with packet filtering based on port and source/destination MAC/IP addresses. For Quality of Service (QoS), the router supports multiple priority queues to enable a group of home or office users to experience the benefit of smooth network connection of inbound and outbound data without concern of traffic congestion. This QoS support allows users to enjoy high ADSL transmission for applications such as VoIP, streaming multimedia and on-line games over the Internet.
-------------------------------------------------
>>> DSL-2640BT How to configuration DSL-2640BT?
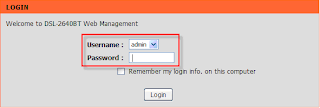
Step 1 Open a Web browser on your computer.
Step 2 Enter http://192.168.1.1 (DSL router default IP address) in the address bar. The
login page appears.
Step 3 Enter a user name and the password. The default username and password of
the super user are admin and admin. The username and password of the
common user are user and user. You need not enter the username and
password again if you select the option Remember my password. It is
recommended to change these default values after logging in to the DSL router
for the first time.
Step 4 Click Login to log in.
If you log in as the super user successfully, the page shown in the figure appears.
If the login information is incorrect, the page shown in the figure appears. Click Try Again to log in again.
Step 5 Choose Setup > Wizard. The page shown in the figure appears.
Click Setup Wizard. The page shown in the figure appears.
Step 6 There are four steps to configure the device. Click Next to continue.
Change the password for logging in to the device.
The default password is admin. To secure your network, modify the password timely.
***Note:Confirm password must be the same as the new password.
To ignore the step, click Skip.
Step 7 Set the time and date.
Step 8 Configure the Internet connection.
Select the country and ISP. Set the VPI and VCI. If you fail to find the country and ISP from
the drop-down lists, select Others.
Step 9
-If the Protocol is PPPoE or PPPoA, the page shown in either of the two figures appears. Set the user name and password as provided by your ISP.
- If the Protocol is Static IP, the page shown in the figure appears.
Enter the IP Address, Subnet Mask, Default Gateway, and Primary DNS Server.
- If the Protocol is Dynamic IP or Bridge, the page shown in the figure appears.
After proper configuration, click Next.
Step 10 Configure the wireless network. Enter the information and click Next.
Step 11 The page shown in the right figure appears. In this page, you can view the configuration information. When the settings are complete, click Restart to apply the settings and reboot the device.
***Note: In each step of the Wizard page, you can click Back to review or modify the
previous settings. Click Cancel to exit the wizard page.
-------------------------------------------------
>>> DSL-2640BT Internet disconnect every 1hour.
***Advise upgrade firmware.
>> DSL-2640BT How to upgrade firmware for DSL-2640BT step by step?
You can download the firwmare at www.dlink.co.th
-Go to "Support and Download"
-Choose "DSL-2640BT" under the drop down list
-Press Go
-Click on the download button to download the firmware to your PC. Please firmware is a zip file, you need to unzip it on your desktop before firmware upgrade.
Step 1. Open a WEB Browser. Type http://192.168.1.1 in the address bar and press “Enter.” The modem login will appear. Enter username “admin” and the password “admin” (default setting)
Step 2. Click on “Maintenance” then Click “Firmware Update” on the Left side of the Screen. Browse the Firmware file Save on your Desktop then click Update Firmware
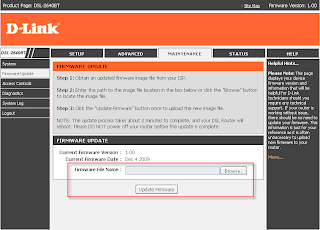
Please note: Downloaded Firmware file might be *.zip file. Please extract the file first to you desktop. Also, Upgrading the Firmware will erase all settings of the Modem. Make sure to backup your settings before performing the upgrade.
------------------------------------------------
Link How to upgrade FIRMWARE ? >>> http://global.dlink.com.sg/site_support/DSL-2640BT/Firmware/DSL-2640BT_howto.doc
------------------------------------------------
>>Ultimate Internet Connection
The DSL-2640BT wireless ADSL router is an affordable high-performance ADSL router for home and the small office. With integrated ADSL2/2+ supporting up to 24Mbps download speed, 802.11g wireless LAN, firewall protection, Quality of Service (QoS) and 4-port switch, this router provides all the essentials that a home or small office needs to establish a secure and high-speed remote link to the outside world.
>>Affordable High Speed Connection for Home & Small Office
Designed as a very affordable high-performance ADSL router for home and SOHO users, the DSL-2640BT provides not only the low-cost, high-speed Internet connection, but also the security and Quality of Service (QoS) required by users in todays high-risk and versatile Internet environments.
>>Ready Wired & Wireless LAN Connection
The DSL-2640BT provides an integrated 802.11g WLAN interface supporting wireless speeds of up to 54Mbps and interoperability with 802.11b wireless devices on the 2.4GHz frequency band. It also provides four 10/100Mbps Ethernet switch ports for ready workstations connection. These built-in functions save you the cost and trouble of installing a separate wireless access point and an Ethernet switch.
>>Firewall Protection & QoS
Security features prevents unauthorized access to the home and office network from Internet intruders. The router provides firewall security using Stateful Packet Inspection (SPI) and Denial of Service (DoS) attack protection. SPI inspects the contents of all incoming packet headers before deciding what packets are allowed to pass through. Router access control is provided with packet filtering based on port and source/destination MAC/IP addresses. For Quality of Service (QoS), the router supports multiple priority queues to enable a group of home or office users to experience the benefit of smooth network connection of inbound and outbound data without concern of traffic congestion. This QoS support allows users to enjoy high ADSL transmission for applications such as VoIP, streaming multimedia and on-line games over the Internet.
-------------------------------------------------
>>> DSL-2640BT How to configuration DSL-2640BT?
Step 1 Open a Web browser on your computer.
Step 2 Enter http://192.168.1.1 (DSL router default IP address) in the address bar. The
login page appears.
Step 3 Enter a user name and the password. The default username and password of
the super user are admin and admin. The username and password of the
common user are user and user. You need not enter the username and
password again if you select the option Remember my password. It is
recommended to change these default values after logging in to the DSL router
for the first time.
Step 4 Click Login to log in.
If you log in as the super user successfully, the page shown in the figure appears.
If the login information is incorrect, the page shown in the figure appears. Click Try Again to log in again.
Step 5 Choose Setup > Wizard. The page shown in the figure appears.
Click Setup Wizard. The page shown in the figure appears.
Step 6 There are four steps to configure the device. Click Next to continue.
Change the password for logging in to the device.
The default password is admin. To secure your network, modify the password timely.
***Note:Confirm password must be the same as the new password.
To ignore the step, click Skip.
Step 7 Set the time and date.
Step 8 Configure the Internet connection.
Select the country and ISP. Set the VPI and VCI. If you fail to find the country and ISP from
the drop-down lists, select Others.
Step 9
-If the Protocol is PPPoE or PPPoA, the page shown in either of the two figures appears. Set the user name and password as provided by your ISP.
- If the Protocol is Static IP, the page shown in the figure appears.
Enter the IP Address, Subnet Mask, Default Gateway, and Primary DNS Server.
- If the Protocol is Dynamic IP or Bridge, the page shown in the figure appears.
After proper configuration, click Next.
Step 10 Configure the wireless network. Enter the information and click Next.
Step 11 The page shown in the right figure appears. In this page, you can view the configuration information. When the settings are complete, click Restart to apply the settings and reboot the device.
***Note: In each step of the Wizard page, you can click Back to review or modify the
previous settings. Click Cancel to exit the wizard page.
-------------------------------------------------
>>> DSL-2640BT Internet disconnect every 1hour.
***Advise upgrade firmware.
>> DSL-2640BT How to upgrade firmware for DSL-2640BT step by step?
You can download the firwmare at www.dlink.co.th
-Go to "Support and Download"
-Choose "DSL-2640BT" under the drop down list
-Press Go
-Click on the download button to download the firmware to your PC. Please firmware is a zip file, you need to unzip it on your desktop before firmware upgrade.
Step 1. Open a WEB Browser. Type http://192.168.1.1 in the address bar and press “Enter.” The modem login will appear. Enter username “admin” and the password “admin” (default setting)

Step 2. Click on “Maintenance” then Click “Firmware Update” on the Left side of the Screen. Browse the Firmware file Save on your Desktop then click Update Firmware

Please note: Downloaded Firmware file might be *.zip file. Please extract the file first to you desktop. Also, Upgrading the Firmware will erase all settings of the Modem. Make sure to backup your settings before performing the upgrade.
------------------------------------------------
Link How to upgrade FIRMWARE ? >>> http://global.dlink.com.sg/site_support/DSL-2640BT/Firmware/DSL-2640BT_howto.doc
------------------------------------------------
DSL-G604T
>>> DSL-G604T How do I configure DSL-G604T to connect to the Internet. (Router mode/ PPPoE)?
Step 1 Connect your PC to the LAN port of your DSL-G604T
Step 2 Start up a Internet explorer and key in 192.168.1.1 (by default)
Step 3 Enter the Username: admin , Password: admin (by default)
Step 4 Click on the Home tab.
Step 6 Click on the Wizard button.
Step 7 Click on the Run Wizard button. Click on the Next icon.
Step 8 Key in a new password into the New Password box followed by keying in the same new password into the Verify Password box. (Or you can leave it blank and click on Next to use the default password :admin) Click on the Next icon.
Step 9 Select the correct Time zone. (GMT +07:00) Bangkok, Jakarta, Hanoi. Click on the Next icon.
Step 10 Select the PPPoE/PPPoA option. Click on the Next icon.
Step 11 Key in your Broadband account User Name and Password.
Step 12 Key in your VPI and VCI values. The value usually comes customized for local ISP. Please do leave it as the default value.
VPI and VCI value;
Singnet : VPI:0, VCI:100
Pacnet : VPI:0, VCI:100
True : VPI:0, VCI:100
TOT : VPI:1, VCI:32
TT&T : VPI:0, VCI:33
BuddyBB : VPI:0, VCI:35
Streamyx : VPI:0, VCI:35
Maxis : VPI:0, VCI:35
Jaring : VPI:0, VCI:35
TelkomSpeedy : Jakarta VPI:0, VCI:35 or please ask Telkom 147 further info at your area ADSL setting. (e.g. ATM PVC Configuration, Service Category, Connection Type, Encapsulation Mode)
Step 13 Select the correct Connection type. PPPoE LLC
(Username might be vary please check with your ISP for the correct username) Click on the Next icon.
Step 14 Click on the Restart icon.
Step 15 You will see that the DSL-G604T is restarting. Please allow one minute of waiting time for the restart process.
Step 16 Lastly, click on the close button to return to the Web Browser configuration.
------------------------------------------------
>>> DSL-G604T How to Setup WEP (Encryption key) for DSL-G604T?
Step 1 Connect your PC to the LAN port of your DSL-G604T
Step 2 Start up a Internet explorer and key in 192.168.1.1 ( by default)
Step 3 Key in your username and password (by default username is 'admin' password is admin as well)
Step 4 Once you login to the D-Link configuration page click on Home > Wireless > Security choose WEP
Step 5 Key in Encryption key. And then click on Apply.
IF you choose HEX
For 64Bit you have to enter 10 characters from 0 ~ 9, A ~ F
For 128Bit you have to enter 26 characters from 0 ~ 9, A ~ F
For 256Bit you have to enter 58 characters from 0 ~ 9, A ~ F
Example: For 64Bit you have to enter 10:124567890
example1:1234567890
example2:AABBCCDDEE
example3:FF12345678
Step 6 Click on Tools > System/Miscellaneous and click on "Save and reboot"
Step 7 After rebooting your wireless signal will be WEP protected
------------------------------------------------
>>> DSL-G604T How to secure wireless network ( WPA-PSK )?
It is recommended to secure your wireless network. To do that you can enable encryption on your router and on your wireless network card. It is recommended to use WPA-PSK or if your wireless card does not support it, use WEP.
Step 1 Connect your PC to the LAN port of your DSL-G604T
Step 2 Start up a Internet explorer and key in 192.168.1.1 ( by default)
Step 3 Key in your username and password (by default username is admin password is admin as well)
Step 4 Once you login to the Dlink configuration page click on Home > Wireless > Security choose WPA
Step 5 Click on Home > Wireless, at the security options choose WPA and key in you PSK HEX or PSK String you can only choose one of the format. Click on Apply after you complete the entry.
Step 6 Click on WAN and do a "Save and reboot" or Click on Tools > System and click on 'Save and reboot'
Step 7 After rebooting you are done with WPA-PSK setup.
If you are having troubles connecting or transferring data go to Advanced > Wireless and set RTS Threshold and Fragmentation Threshold to 2306. Set Preamble to Short. Use the same settings on your wireless card (if applicable).
-------------------------------------------------
Step 1 Connect your PC to the LAN port of your DSL-G604T
Step 2 Start up a Internet explorer and key in 192.168.1.1 (by default)
Step 3 Enter the Username: admin , Password: admin (by default)
Step 4 Click on the Home tab.
Step 6 Click on the Wizard button.
Step 7 Click on the Run Wizard button. Click on the Next icon.
Step 8 Key in a new password into the New Password box followed by keying in the same new password into the Verify Password box. (Or you can leave it blank and click on Next to use the default password :admin) Click on the Next icon.
Step 9 Select the correct Time zone. (GMT +07:00) Bangkok, Jakarta, Hanoi. Click on the Next icon.
Step 10 Select the PPPoE/PPPoA option. Click on the Next icon.
Step 11 Key in your Broadband account User Name and Password.
Step 12 Key in your VPI and VCI values. The value usually comes customized for local ISP. Please do leave it as the default value.
VPI and VCI value;
Singnet : VPI:0, VCI:100
Pacnet : VPI:0, VCI:100
True : VPI:0, VCI:100
TOT : VPI:1, VCI:32
TT&T : VPI:0, VCI:33
BuddyBB : VPI:0, VCI:35
Streamyx : VPI:0, VCI:35
Maxis : VPI:0, VCI:35
Jaring : VPI:0, VCI:35
TelkomSpeedy : Jakarta VPI:0, VCI:35 or please ask Telkom 147 further info at your area ADSL setting. (e.g. ATM PVC Configuration, Service Category, Connection Type, Encapsulation Mode)
Step 13 Select the correct Connection type. PPPoE LLC
(Username might be vary please check with your ISP for the correct username) Click on the Next icon.
Step 14 Click on the Restart icon.
Step 15 You will see that the DSL-G604T is restarting. Please allow one minute of waiting time for the restart process.
Step 16 Lastly, click on the close button to return to the Web Browser configuration.
------------------------------------------------
>>> DSL-G604T How to Setup WEP (Encryption key) for DSL-G604T?
Step 1 Connect your PC to the LAN port of your DSL-G604T
Step 2 Start up a Internet explorer and key in 192.168.1.1 ( by default)
Step 3 Key in your username and password (by default username is 'admin' password is admin as well)
Step 4 Once you login to the D-Link configuration page click on Home > Wireless > Security choose WEP
Step 5 Key in Encryption key. And then click on Apply.
IF you choose HEX
For 64Bit you have to enter 10 characters from 0 ~ 9, A ~ F
For 128Bit you have to enter 26 characters from 0 ~ 9, A ~ F
For 256Bit you have to enter 58 characters from 0 ~ 9, A ~ F
Example: For 64Bit you have to enter 10:124567890
example1:1234567890
example2:AABBCCDDEE
example3:FF12345678
Step 6 Click on Tools > System/Miscellaneous and click on "Save and reboot"
Step 7 After rebooting your wireless signal will be WEP protected
------------------------------------------------
>>> DSL-G604T How to secure wireless network ( WPA-PSK )?
It is recommended to secure your wireless network. To do that you can enable encryption on your router and on your wireless network card. It is recommended to use WPA-PSK or if your wireless card does not support it, use WEP.
Step 1 Connect your PC to the LAN port of your DSL-G604T
Step 2 Start up a Internet explorer and key in 192.168.1.1 ( by default)
Step 3 Key in your username and password (by default username is admin password is admin as well)
Step 4 Once you login to the Dlink configuration page click on Home > Wireless > Security choose WPA
Step 5 Click on Home > Wireless, at the security options choose WPA and key in you PSK HEX or PSK String you can only choose one of the format. Click on Apply after you complete the entry.
Step 6 Click on WAN and do a "Save and reboot" or Click on Tools > System and click on 'Save and reboot'
Step 7 After rebooting you are done with WPA-PSK setup.
If you are having troubles connecting or transferring data go to Advanced > Wireless and set RTS Threshold and Fragmentation Threshold to 2306. Set Preamble to Short. Use the same settings on your wireless card (if applicable).
-------------------------------------------------
DSL-2740B
>>> DSL-2740B Feature and Specification
>>Introduction
HIGH-SPEED ADSL2/2+ INTERNET CONNECTION
Latest ADSL2/2+ standards provide Internet transmission of up to 24Mbps downstream, 1Mbps upstream.
HIGH-PERFORMANCE WIRELESS
Embedded 802.11n technology for high-speed wireless connection, complete compatibility with 802.11b/g wireless devices
TOTAL SECURITY
Firewall protection from Internet attacks, user access control, WPA/WPA2 wireless security.
ULTIMATE INTERNET CONNECTION
The DSL-2740B ADSL2+ router is a versatile, high-performance remote router for home and the small office. With integrated ADSL2/2+ supporting up to 24Mbps
download speed, firewall protection, Quality of Service (QoS), 802.11n wireless LAN and 4 Ethernet switch ports, this router provides all the functions that a
home or small office needs to establish a secure and high-speed remote link to the outside world.
ULTIMATE WIRELESS CONNECTION WITH MAXIMUM SECURITY
This router provides maximize wireless performance by connecting this router to computer interfaces and stay connected from virtually anywhere at home and in
the office. The router can be used with 802.11b/g/n wireless networks to enable significantly improved reception. It supports WPA/WPA2 and WEP for flexible
user access security and data encryption methods.
FIREWALL PROTECTION & QoS
Security features prevents unauthorized access to the home and office network, be it from the wireless devices or from the Internet. The router provides firewall
security using Stateful Packet Inspection (SPI) and hacker attack logging for Denial of Service (DoS) attack protection. SPI inspects the contents of all incoming
packet headers before deciding what packets are allowed to pass through. Router access control is provided with packet filtering based on port and
source/destination MAC/IP addresses. For Quality of Service (QoS), the router supports multiple priority queues to enable a group of home or office users to
experience the benefit of smooth network connection of inbound and outbound data without concern of traffic congestion. This QoS support allows users to enjoy
high ADSL transmission for applications such as VoIP and streaming multimedia over the Internet.
>>>Features
• Faster Wireless Networking - The DSL-2740B provides up to 270Mbps* wireless connection with other 802.11n wireless clients. This
capability allows users to participate in real-time activities online, such as video streaming, online gaming, and real-time audio.
• Compatible with 802.11b and 802.11g Devices - The DSL-2740B is still fully compatible with the IEEE 802.11b and g standards, so it can
connect with existing 802.11b and g PCI, USB and Cardbus adapters.
• DHCP Support - Dynamic Host Configuration Protocol automatically and dynamically assigns all LAN IP settings to each host on your
network. This eliminates the need to reconfigure every host whenever changes in network topology occur.
• Network Address Translation (NAT) - For small office environments, the DSL-2740B allows multiple users on the LAN to access the
Internet concurrently through a single Internet account. This provides Internet access to everyone in the office for the price of a single user.
NAT improves network security in effect by hiding the private network behind one global and visible IP address. NAT address mapping can
also be used to link two IP domains via a LAN-to-LAN connection.
• Precise ATM Traffic Shaping - Traffic shaping is a method of controlling the flow rate of ATM data cells. This function helps to establish the
Quality of Service for ATM data transfer.
• High Performance - Very high rates of data transfer are possible with the Router. Up to 24Mbps downstream bit rate using the G.dmt
standard. (For ADSL2+)
• Full Network Management - The DSL-2740B incorporates SNMP (Simple Network Management Protocol) support for web-based
management and text-based network management via Telnet connection.
• Easy Installation - The DSL-2740B uses a web-based graphical user interface program for convenient management access and easy set
up. Any common web browser software can be used to manage the Router.
------------------------------------------------
>>> DSL-2740B Basic Installation/Configuration
Step 1 open a web-browser such as Internet Explorer and enter the IP address of the router (192.168.1.1).
Step 2 Type “admin” for the User Name and “admin” in the Password field.
Step 3 Setup Tab --> Wizard Click on the Setup Wizard button to launch the Setup Wizard.
Step 4 WELCOME TO D-LINK SETUP WIZARD There are six steps to configuring your router. Click on the Next to continue.
Step 5 CHANGE YOUR DSL-2740B PASSWORD The default password is "admin", in order to secure your network, please modify the password. Note: Confirm Password must be same as "New Password". Of course, you can click on the Skip to ignore the step.
Step 6 TIME Check the Enable NTP Server.
Select specific time server to use from the NTP Server Used drop-down menu.
Select your operating time zone from the Time Zone drop-down menu.
Check the Enable Daylight Saving if needed and then select the proper
Daylight Saving Offset drop-down menu. Configure the Daylight
Saving Dates from start date to end.
Click on the Save Settings button to apply your settings.
Step 7 SELECT INTERNET CONNECTION TYPE
Please select your Country and ISP, Protocol, Connection Type, the VPI and VCI information Will display Automatically. Of course, you can modify the information.
If, you can not find the country and ISP in the list below; you can select
"Others", and then input the "VPI" and "VCI” and Connection Type.
The Auto PVC Scan feature will not work in all cases so please enter the VPI/VCI numbers if provided by the ISP.
VPI and VCI value
Singnet : VPI:0, VCI:100
Pacnet : VPI:0, VCI:100
True : VPI:0, VCI:100
TOT : VPI:1, VCI:32
TT&T : VPI:0, VCI:33
3BB : VPI:0, VCI:33
Maxnet : VPI:0, VCI:33
CS Loginfo : VPI:0, VCI:33
BuddyBB : VPI:0, VCI:35
Streamyx : VPI:0, VCI:35
Maxis : VPI:0, VCI:35
Jaring : VPI:0, VCI:35
Click on the Next button to go to the next Setup Wizard window.
Step 8 Change Protocol to PPPoE/PPPoA connection
Step 9 Type in the Username and Password (and PPPoE Service Name, if required by your ISP).
Click on the Next button to go to the next Setup Wizard window.
Step 10 Using the Setup Wizard - For Wireless LAN Settings
Click the Enable Wireless box to allow the router to operate in the wireless environment.
The SSID identifies members of the Service Set. Accept the default name or change it to something else. If the default SSID is changed, all other devices on the wireless network must use the same SSID.
Set security Mode, select this option if your wireless adapters support
Click Next to go to the next window and complete the Setup Wizard.
Step 11 Setup Wizard - For LAN Settings
You can configure the LAN IP address to suit your preference. Many users will find it convenient to use the default settings together with DHCP service to manage the IP settings for their private network. The IP address of the Router is the base address used for DHCP. In order to use the Router for DHCP on your LAN, the IP address pool used for DHCP must be compatible with the IP address of the Router. The IP addresses available in the DHCP IP address pool will change automatically if you change the IP address of the Router.
Enter the desired IP address and Subnet Mask.
Enter the Start and Stop IP Address for the DHCP Server, or disable
DHCP Server.
Click Next to go to the next Setup Wizard window.
Step 12 RESTART
Click Back to review or modify settings. Click on Restart to apply current settings and reboot the DSL-2740B router. If your Internet connection does not work after the router restarts, you can try the Setup Wizard again with alternative settings or use Manual Setup instead provided you have your Internet connection details as provided to you by your ISP.
------------------------------------------------
>>> DSL-2740B How to enable WEP security
Step 1. Open your Web browser and enter the IP address of the router (192.168.1.1). Enter user name (admin) and password (the default is admin).
Step 2. Click on the WLAN button on the left side of your screen.
Step 3. Make sure the Enable Wireless option is selected.
Your wireless network name is displayed under the SSID field. You can change to anything you want.
Click on Save Settings when finished.
Step 4. Click on ADVANCED tab at the top of the screen and then click on WLAN SECURITY button on the left.
Step 5. Under Network Authentication select the type of security you want to have on your wireless network. We recommend WPA-PSK. If any of your wireless clients do not support WPA-PSK (WPA Personal), select the Shared option (WEP).
Under Network Authentication select Shared.
Set WEP Encryption to 'Enabled'.
Encryption Strength - choose 128 bit or 64 bit.
Current Network Key - 1.
Under Network Key 1 enter the key you want to use. 128 bit encryption requires 26 character HEX key (HEX characters include numbers from 0 to 9 and letters from A to F).
Step 6. Click on Save Settings.
When connecting your computers to the wireless network, make sure you use the same settings on your wireless adapter (e.g. WEP key 128 bit, HEX format). Please refer to your wireless adapter's guide on how to connect to a secure network.
------------------------------------------------
>>> DSL-2740B How to enable WPA-PSK security?
To setup wireless on your router and secure your wireless network please follow these steps:
Step 1. Open your Web browser and enter the IP address of the router (192.168.1.1). Enter user name (admin) and password (the default is admin).
Step 2. Click on the WLAN button on the left side of your screen.
Step 3. Make sure the Enable Wireless option is selected.
Your wireless network name is displayed under the SSID field. You can change to anything you want. Click on Save Settings when finished.
Step 4. Click on ADVANCED tab at the top of the screen and then click on WLAN SECURITY button on the left.
Step 5. Under Network Authentication select the type of security you want to have on your wireless network. We recommend WPA-PSK.
Under Network Authentication select 'WPA-PSK'.
Under WPA Pre-Shared Key specify a passphrase/key. You can just make it up. The key should be at least 8 characters long.
WPA Group Rekey Interval - 0
WPA Encryption - TKIP
Step 6. Click on Save Settings.
When connecting your computers to the wireless network, make sure you use the same security settings on your wireless adapter e.g. WPA-PSK with the same passphrase/key. Note that it is case sensitive. Please refer to your wireless adapter's guide on how to connect to a secure network.
-------------------------------------------------
>>> DSL-2740B How to setup virtual server (Port forwarding)?
Opening ports in the router allows certain applications to access a device or a computer on your local network from the Internet. With its default settings the router allows all outgoing requests to go out and replies to those requests to get in. Some applications however require additional 'replies' to go through. That's when you need to open ports in your router. To open ports in your DSL-2740B router please follow these steps:
Step 1. Set the computer (or the device) which requires ports to be opened for, with static IP address. You can choose any IP address from the range of addresses you are using on your local network, as soon as it is not used by any other device. The default range is from 192.168.1.2 to 192.168.1.254. In our example we are using 192.168.1.99.
Windows XP: Control Panel > Network Connections > Local Area Connection > Properties > Internet protocol TCP/IP > Properties
Windows Vista: Control Panel > Network and Internet > [Network and Sharing Centre] > View Network Status and Tasks > View Status > Properties > Internet Protocol v4 > Properties
Select the 'Use the following IP address' option:
IP address: 192.168.1.99
Subnet mask: 255.255.255.0
Default Gateway: 192.168.1.1 (your router's address)
DNS: 192.168.1.1 and 61.88.88.88 (or whichever your provider is using)
Step 2. Open your Web browser and enter the IP address of the router (192.168.1.1). Enter user name (admin) and password (the default is admin).
Step 3. Click on ADVANCED and then on VIRTUAL SERVER button on the left side of your screen. Click on the 'Add a Rule' button.
Step 4. When adding a rule which opens ports:
under 'Select a Service' select the application you want to open the ports for.
under 'Server IP Address' type in the IP address of the computer/device you are opening ports for (the IP you have set in Step 1).
If you do not see your particular application/service in the drop-down list, see the additional Step 4a below.
Step 4a. You need to do this step only if your application /service is not listed in the drop-down list. Select the 'Custom Server' option.
under 'Customer Server' type in the name you want to give to this rule (e.g. Xbox 360).
under 'Server IP Address' type in the IP address of the computer/device you are opening ports for (the IP you have set in Step 1).
Now specify the ports and protocols that you need to open:
- If you need to open a single port enter the port number under both External Port Start and External Port End. Select the required protocol (TCP or UDP). You do not need to modify anything under the Internal Port fields.
- If you need to open a range of ports specify the beginning of the range under External Port Start. Specify the end of the range under External Port End. Select the required protocol (TCP or UDP). You do not need to modify anything under the Internal Port fields.
Step 5. When finished click on the 'Add Rules' button.
Be aware that many Internet Providers are blocking commonly used ports like 80 and 21, hence you will not be able to host a WEB site or a FTP site even if you open the necessary ports in the router.
Please note that from inside your LAN you will not be able to access your server using its public (Internet) IP address or FQDN name. On your LAN you will need to use its local IP address instead (e.g. 192.168.1.99).
-------------------------------------------------
DSL-2640T
>>> DSL-2640T Specification and feature
>>>Router Description and Operation
The DSL-2640T Wireless ADSL2+ Router is designed to provide connectivity for your private Ethernet LAN, and 802.11g/802.11b wireless LAN to the Internet via an ADSL connection.
The Router is easy to install and use. Standard Ethernet ports are used to connect to computer or other Ethernet devices.
The 802.11g wireless interface provides connectivity to 802.11g or 802.11b wireless devices.
>>802.11g Wireless
The embedded 802.11g wireless access point provides Internet access and connectivity to the Ethernet for 802.11g and 802.11b wireless workstations. IEEE 802.11g is fully compatible with IEEE 802.11b wireless devices. The 802.11g standard supports data transfer rates of up to 54 Mbps. The wireless Router supports 64-bit and 128-bit WEP encryption.
>>ADSL
Asymmetric Digital Subscriber Line (ADSL) is a broadband network technology that utilizes standard twisted-pair copper wire telephone lines to enable broadband high-speed digital data transmission and bandwidth hungry applications for business and residential customers.
ADSL2+ routers and modems provide faster downloads and more reliable connectivity to the user without loss of quality or disruption of voice/fax telephone capabilities.
ADSL2+ provides a dedicated service over a single telephone line operating at speeds of up to 24Mbps downstream and up to 1Mbps upstream, depending on local telephone line conditions. A secure point-to-point connection is established between the user and the central office of the service provider.
D-Link ADSL devices incorporate the recommendations of the ADSL Forum regarding framing, data format, and upper
layer protocols.
>>>Router Features
The DSL-2640T ADSL 2+ Router utilizes the latest ADSL enhancements to provide a reliable Internet portal suitable for most small to medium sized offices. DSL-2640T advantages include:
• PPP (Point-to-Point Protocol) Security – The DSL-2640T ADSL 2+ Router supports PAP (Password
Authentication Protocol) and CHAP (Challenge Handshake Authentication Protocol) for PPP connections.
• DHCP Support – Dynamic Host Configuration Protocol automatically and dynamically assigns all LAN IP settings to each host on your network. This eliminates the need to reconfigure every host whenever changes in network topology occur.
• Network Address Translation (NAT) – For small office environments, the DSL-2640T allows multiple users on the LAN to access the Internet concurrently through a single Internet account. This provides Internet access to everyone in the office for the price of a single user.
NAT improves network security in effect by hiding the private network behind one global and visible IP address.
NAT address mapping can also be used to link two IP domains via a LAN-to-LAN connection.
• TCP/IP (Transfer Control Protocol/Internet Protocol) – The DSL-2640T supports TCP/IP protocol, the language used for the Internet. It is compatible with access servers manufactured by major vendors.
• RIP-1/RIP-2 – The DSL-2640T supports both RIP-1 and RIP-2 exchanges with other routers. Using both versions lets the Router to communicate with all RIP enabled devices.
• Static Routing – This allows you to select a data path to a particular network destination that will remain in the routing table and never “age out”. If you wish to define a specific route that will always be used for data traffic from your LAN to a specific destination within your LAN (for example to another router or a server) or outside your network (to an ISP defined default gateway for instance).
• Default Routing – This allows you to choose a default path for incoming data packets for which the destination address is unknown. This is particularly useful when/if the Router functions as the sole connection to the Internet.
• ATM (Asynchronous Transfer Mode) – The DSL-2640T supports Bridged Ethernet over ATM (RFC1483), IP over ATM (RFC1577) and PPP over ATM (RFC 2364).
• Precise ATM Traffic Shaping – Traffic shaping is a method of controlling the flow rate of ATM data cells. This function helps to establish the Quality of Service for ATM data transfer.
• G.hs (Auto-handshake) – This allows the Router to automatically choose either the G.lite or G.dmt ADSL connection standards.
• High Performance – Very high rates of data transfer are possible with the Router. Up to 8 Mbps downstream bit rate using the G.dmt standard.
• Full Network Management – The DSL-2640T incorporates SNMP (Simple Network Management Protocol)
support for web-based management and text-based network management via an RS-232 or Telnet connection.
• Telnet Connection – The Telnet enables a network manager to access the Router’s management software remotely.
• Easy Installation – The DSL-2640T uses a web-based graphical user interface program for convenient management access and easy set up. Any common web browser software can be used to manage the Router.
------------------------------------------------
>>> DSL-2640T How to configure DSL-2640T to connect Internet (Router mode)?
Step 1 Connect your PC to the LAN port of your DSL-2640T
Step 2 Start up a Internet explorer and key in 192.168.1.1 (by default)
Step 3 Enter the Username: admin , Password: admin (by default)
Step 4 Click on the Home tab.
Step 6 Click on the Wizard button.
Step 7 Click on the Run Wizard button. Click on the Next icon.
Step 8 Select the correct Time zone. Click on the Next icon.
Step 9 Select the PPPoE/PPPoA option. Click on the Next icon.
Step 10 Key in your Broadband account User Name and Password.
Step 11 Key in your VPI and VCI values. The value usually comes customized for local ISP. Please do leave it as the default value.
VPI and VCI value
Singnet : VPI:0, VCI:100
Pacnet : VPI:0, VCI:100
True : VPI:0, VCI:100
TOT : VPI:1, VCI:32
TT&T : VPI:0, VCI:33
CS Loginfo : VPI:0, VCI:33
BuddyBB : VPI:0, VCI:35
Streamyx : VPI:0, VCI:35
Maxis : VPI:0, VCI:35
Jaring : VPI:0, VCI:35
Step 13 Select the correct Connection type. PPPoE LLC
(Username might be vary please check with your ISP for the correct username) Click on the Next icon.
Step 14 Key in your Wireless LAN Connection. Key in your SSID, Channel and Security.
Step 15 Security choose WEP
Step 16 Key in Encryption key. And then click on Apply.
IF you choose HEX
For 64Bit you have to enter 10 characters from 0 ~ 9, A ~ F
For 128Bit you have to enter 26 characters from 0 ~ 9, A ~ F
For 256Bit you have to enter 58 characters from 0 ~ 9, A ~ F
Example: For 64Bit you have to enter 10:124567890
example1:1234567890
example2:AABBCCDDEE
example3:FF12345678
Step 17 Click on the Restart icon.
Step 18 You will see that the DSL-2640T is restarting. Please allow one minute of waiting time for the restart process.
Step 19 Lastly, click on the close button to return to the Web Browser configuration.
------------------------------------------------
>>> DSL-2640T How to Setup WEP (Encryption key) for DSL-2640T?
Step 1 Connect your PC to the LAN port of your DSL-2640T
Step 2 Start up a Internet explorer and key in 192.168.1.1 ( by default)
Step 3 Key in your username and password (by default username is 'admin' password is admin as well)
Step 4 Once you login to the D-Link configuration page click on Home > Wireless > Security choose WEP
Step 5 Key in Encryption key. And then click on Apply.
IF you choose HEX
For 64Bit you have to enter 10 characters from 0 ~ 9, A ~ F
For 128Bit you have to enter 26 characters from 0 ~ 9, A ~ F
For 256Bit you have to enter 58 characters from 0 ~ 9, A ~ F
Example: For 64Bit you have to enter 10:124567890
example1:1234567890
example2:AABBCCDDEE
example3:FF12345678
Step 6 Click on Tools > System and click on "Save and reboot"
Step 7 After rebooting your wireless signal will be WEP protected
------------------------------------------------
>>> DSL-2640T How to Setup WPA-PSK (Encryption key) for DSL-2640T?
Step 1 Connect your PC to the LAN port of your DSL-2640T
Step 2 Start up a Internet explorer and key in 192.168.1.1 ( by default)
Step 3 Key in your username and password (by default username is 'admin' password is admin as well)
Step 4 Once you login to the D-Link configuration page click on Home > Wireless > Security choose WPA and Pre-Shared key
Step 5 In Encryption key, you must create a password on this field. Please key in minimum 8 digits characters. this will be your wireless password in future. And then click on Apply.
Step 6 Click on Tools > System and click on "Save and reboot"
Step 7 After rebooting your wireless signal will be WPA-PSK protected.
------------------------------------------------
>>> DSL-2640T How to block user to LAN access the internet?
1. Advanced >> Filter
Filters
Filter rules in the Router are put in place to allow or block specified traffic. The Filter Rules however can be used in a
single direction to examine and then Allow or Deny traffic for Inbound (WAN to LAN) or Outbound (LAN to WAN)
routed data. The rules are based on IP address and TCP/UDP port.
Configure the filter rules as desired and click the Apply button to create the rule. The newly created rule appears listed
in the Outbound Filter List at the bottom of the window. The table below describes the various parameters that are
configured for the filter rules.
To modify any previously created filter rule, click on the note pad icon in the right hand column of the Filter List for the
set you want to configure. Adjust the settings as desired and click the Apply button to put the new settings into effect.
First determine the direction of the traffic you want the rule to filter. To filter WAN to LAN traffic, select the Inbound
Filter option. Any new Inbound Filter rules created will appear in the list. Likewise, should you to filter LAN to WAN
traffic, create an Outbound Filter rule.
Click the Apply button to put the new rule into effect. Any filter rule configured in the menu will appear in the Filters
List with the new settings. The Router must save the new settings and reboot before the new rules are applied.
2. Select Outbound Filter or Inbound Filter.
3. Assign Source IP ,Destination IP ,Source Port ,Destination Port , Protocol ,Action.
4. Filters Parameter : Description
>>Source IP
For an Outbound Filter, this is the IP address or IP addresses on your LAN
for which you are creating the filter rule. For an Inbound Filter, this is the
IP address or IP addresses for which you are creating the filter rule. You
can opt to indicate a Single IP, an IP Range or Any IP from the pull-down
menu. Choosing Any IP will apply the rule to all WAN or all LAN IP
addresses depending on which type of rule (Inbound or Outbound) is being
configured.
>>Destination IP
Where the Destination IP address resides also depends on if you are
configuring an Inbound or Outbound filter rule. You can opt to indicate a
Single IP, an IP Range or Any IP from the pull-down menu.
>>Source Port
The Source Port is the TCP/UDP port on either the LAN or WAN depending
on if you are configuring an Outbound or Inbound Filter rule. Select one of
the following options from the pull-down menu to define Any Port, Single
Port, Port Range or Safe Range (ports above 1024).
>>Destination Port
The Destination Port is the TCP/UDP port on either the LAN or WAN
depending on if you are configuring an Outbound or Inbound Filter rule.
Select one of the following options from the pull-down menu to define a
Any Port, Single Port, Port Range or Safe Range (ports above 1024).
>>Protocol
Select the transport protocol (TCP, UDP or TCP/UDP) that will be used for
the filter rule.
>>Action
Select to Allow or Deny transport of the data packets according to the
criteria defined in the rule. Packets that are allowed are routed to their
destination; packets that are denied are blocked.
5. Click Apply
6. Tools >> System >> Save&Reboot
------------------------------------------------
>>> DSL-2640T How to configure wireless management in DSL-2640T ( Access List)
Step 1 Login to the DSL-2640T configuration page via Internet explorer, type in http://192.168.1.1 in IE at address column and enter
Step 2 key in username and password, (by default username:admin password:admin)
Step 3 After successful login to the configuration page, click on Advanced > wireless management.
Step 4 Checked Access List.
Step 5 Checked Enable Access List.
Step 6 Choose Allow or Deny the MAC address you wish to manage.
Step 7 Key in the Client Mac address in Mac address column.
Correct format for MAC address entry is XX-XX-XX-XX-XX-XX
Step 8 Click on Add to Add in the Client MAC address.
Step 9 Click on Apply
Step 10 go to Tools > System > Save and reboot.
------------------------------------------------
If you wants to block by MAC Address for LAN card, it is impossible. You can suggest block by IP Address. User can fix IP Address on his computer.
FYI, Bridge Filter is for remote site PC, not for local site PC.
------------------------------------------------
>>> DSL-2640T How to configure DSL-2604T for Virtual Server (Port Forwarding)?
Step 1 Connect your PC to the LAN port of your DSL-2604T
Step 2 Start up an Internet explorer and key in 192.168.1.1 (by default)
Step 3 Key in your username and password (by default username is admin password is admin as well)
Step 4 Click on Advance > LAN Clients to assign Static IP to client (s).
**You need to set you PC to static IP***
IP Address: Enter the IP address of the client.
Host Name: Give a name to the application.
Step 5 Click Apply to allow the rules to be created and it will be appearing under Static Address List.
Step 6 Click on Virtual Server > User > Add.
Step 7 Create the rules under Rule Management. Click on the Apply icon.
Rule Name: Application Rule Name
Protocol: Type of protocol (e.g. TCP, UDP or TCP and UDP)
Port Start: Starting Port Number
Port End: Ending Port Number
Port Map: Mapping to the starting port
Port Map End: Mapping to the ending port
Step 8 Click on the Virtual Server to go back to main menu.
Step 9 Click on User under Category.
Step 10 Under LAN IP, select the appropriate IP address which the rules will be applied to Example: 192.168.1.4
Step 11 Under the Available Rules, select the rules and click Add.
Step 12 Rules created will be shown under Applied Rules.
Step 13 Click on Apply.
Step 14 Click on Tools > System > Save and Reboot.
Port Forwarding is rules is completed.
***NOTE: Link configure DSL-2604T for Virtual Server (Port Forwarding) step by step
>>> http://www.dlink.co.th/support/support_faq.asp?idfaq=206
------------------------------------------------
>>> DSL-2640T Remote Web Management and Remote Telnet Access
The Administrator Settings window is also used to enable remote Telnet management, remote SSH management and remote web management access to the Router.
In each case, the procedure to enable remote management of the Router is the same. First, select the State Enabled radio button for Remote Web Management, Remote Telnet Management, or Remote SSH Management, and then type the IP Address and Netmask of the remote network or system used for management.
Finally, click the Apply button to activate remote management from the chosen IP address. Be sure to save the new setting.
------------------------------------------------
>>> Remote Managament of DSL-series routers
If you want to enable remote management so the router's settings can be changed by logging into it from the Internet, follow these steps:
Step 1 Open your web browser and enter the IP address of the router (192.168.1.1). Enter user name (admin) and your password (admin).
Step 2 Select Tools and then Admin in the menu on the left.
Step 3 Make sure you change the default password to something different (remember the password that you set on the router otherwise you will have to reset it to defaults). Click Apply.
Step 4 If you are running a WEB server on your LAN and need port 80 to be forwarded to the WEB server, change the WebPort to something different (e.g. 88). Otherwise leave it on 80.
Step 5 Under Remote Web Management set State to 'Enabled'. Specify the public IP Address and Subnet Mask of the computer which you allow to manage your router.
If the IP address is unknown or dynamic, set IP Address as 203.1.1.1 and Subnet Mask to 0.0.0.0. This will allow ANY IP to connect to your router.
Step 6 Click Apply. Then select Tools > System > Save and Reboot.
After the router reconnects to the Internet go to Status and check what IP address the router has got under WAN. This is the IP address it will be accessible on from the Internet.
------------------------------------------------
>>> DSL-2640T How do i upgrade firmware (FIRMWARE UPGRADE STEPS)
WARNING: DO NOT upgrade the firmware through a wireless connection. You may damage the router. Note that you will have to reconfigure the router after upgrading.
Step 1 Connect your PC to the LAN port of your DSL-2640T
Step 2. Please download the firmware at this link http://www.dlink.co.th/support/support_detail.asp?idProduct=165
Step 3. Open your Internet Browser and in the address bar type in http://192.168.1.1. Press Enter and you will be promted to enter username and password to log into the router's configuration: Username = admin Password = admin
Step 4. Click on Tools > System > Save Settings To Local Hard Drive > save the file setting configuration on your local hard drive.
Step 5. Click on Tools > Firmware.
Step 6. Click the Browse button, via the dialog that pops up, browse for the Firmware file that you downloaded earlier.
Step 7. Highlight the file, then click on the Open button on the dialog box.
Step 8. The router Configuration page will show the location of the file you are using.
Note: Ensure that its the correct one to use. Click on the Apply button.
Step 9. The router will begin the update to the new firmware.
Note: It is important to not disrupt this process.
Step 10. When the firmware has been successfully applied, the Configuration Page will return to the main Configuration screen when you first successfully login.
Step 11. You can ensure that the firmware upgrade was successful by clicking on the Status Menu, and referring to the Firmware version which is displayed at the top of the Status Menu.
Step 12. Once the firmware upgrade is successful, please perform again a factory reset as per below:
1. Locate th…
***NOTE:Link download firmware ((Version 20080725)) >>>> http://www.dlink.co.th/support/support_detail.asp?idProduct=165
After update firmware already you must save&reboot DSL-2640T.
------------------------------------------------
DSL-2640B
>>> DSL-2640B Basic Installation/Configuration
Step 1 Connect your PC to the LAN port of your DSL-2640B
Step 2 Start up a Internet explorer and key in 192.168.1.1 (by default)
Step 3 Enter the Username: admin , Password: tot (default by TOT)
Step 4 Click on the Home tab.
Step 5 Click disable DSL Auto-connect.
Step 6 Enter VPI/VCI
***VPI and VCI value***
Singnet : VPI:0, VCI:100
Pacnet : VPI:0, VCI:100
True : VPI:0, VCI:100
TOT : VPI:1, VCI:32
TT&T : VPI:0, VCI:33
CS Loginfo : VPI:0, VCI:33
BuddyBB : VPI:0, VCI:35
Streamyx : VPI:0, VCI:35
Maxis : VPI:0, VCI:35
Jaring : VPI:0, VCI:35
Step 7 Click next.
Step 8 Click PPP over Ethernet (PPPoE)
Step 9 Set Encapsulation Mode to LLC/SNAP-BRIDGEING
Step 10 Click Next.
Step 11 Enter Username and Password that your ISP.
Step 12 Click Next.
Step 13 Click Next.
Step 14 Configure the DSL Router IP Address and Subnet Mask for your Local Area Network (LAN).
Step 15 Click Next.
Step 16 Setup wireless.
Step 17 Click Next.
Step 18 Click Save/Reboot
------------------------------------------------
>>> DSL-2640B WEP Configuration
Step 1 Open IE. Enter 192.168.1.1 in to address.
Step 2 Enter username admin,Password tot.
Step 3 Click Advance setting.
Step 4 Click wireless setup.
Step 5 Click security.
Step 6 Set WEP Encryption to Enable.
Step 7 Set Encryption Strength to 64bit.
Step 8 Enter 5 ASCII characters or 10 hexadecimal digits for 64-bit encryption keys
Step 9 Click apply.
Step 10 On Tools tab. Click System menu.
Step 11 Click Save and reboot.
-----------------------------------------------
>>> DSL-2640B Port forwarding
Link DSL-2640B Forwarding port >>> http://www.avbell.com/Manual/DSL_2640B/Forward%20Port%20D-Link%20_DSL-2640B_.pdf
-----------------------------------------------
DSL-2540T
>>> DSL-2540T Basic Installation/Configuration
Login to Home Page
To use the web-based management software, launch a suitable web browser and direct it to the IP address of the Router.
Type in http:// followed by the default IP address, 192.168.1.1 in the address bar of the browser. The URL in the
address bar should read: http://192.168.1.1.
A dialog box prompts for the User Name and Password. Type in the default User Name “admin,” and the default
Password “admin” then click the OK button to access the web-based manager.
You should change the web-based manager access user name and password once you have verified that a connection
can be established. The user name and password allows any PC within the same subnet as the Router to access the webbased
manger.
Configure the Router
When you successfully connect to the web manager, the Home directory tab will display the Setup Wizard window.
You can launch the Setup Wizard from this page or use the buttons located in the left panel of the web page to view
other windows used for basic configuration.
All configuration and management of the Router is done using the web-based management interface pictured in the
above example. The configuration windows are accessed by clicking on the directory tabs: Home, Advanced, Tools,
Status, and Help. Each tab has associated window buttons in the left hand panel of the web interface. Basic setup of the
Router can be completed in the windows accessed from the Home directory including: (Setup) Wizard, WAN
(Internet), LAN (to configure the IP address of the Router) DHCP, DNS and Dynamic DNS.
Wizard
To use the Setup Wizard, click the Run Wizard button in the first browser window and follow the instructions in the
pop-up window that appears.
The initial window summarizes the setup process. Click the Next button to proceed. You may stop using the Setup
Wizard at any time by clicking the Exit button. If you exit the wizard you will return to the Setup Wizard window
without saving any of the settings changed during the process.
The first pop-up window of the Setup Wizard lists the basic steps in the process. These steps are as follows:
1. Set the system time.
2. Configure the connection to the Internet.
3. Save the new configuration settings and reboot the system.
Using the Setup Wizard - Choose Time Zone
Choose the time zone you are in from the pull-down menu and click Next. This sets the system time used for the Router.
If you wish to return to the previous window during the setup process, click the Back button.
Using the Setup Wizard - Choose Connection Type
Now select the Connection Type used for the Internet connection. Your ISP has given this information to you. The
connection types available for “Multi-User” Mode are PPPoE/PPPoA, Dynamic IP Address, Static IP Address, and
Bridge Mode. Each connection type has different settings that are configured in the next Setup Wizard window.
Select the Connection Type specific to your service and click Next to go to the next Setup Wizard window. Follow
the instructions below for the type of connection you have selected.
Using the Setup Wizard - For PPPoE/PPPoA connections:
1. Type in the Username and Password used to identify and verify your account to the ISP.
2. Select the specific Connection Type from the drop-down menu. The available PPP connection and
encapsulation types are PPPoE LLC, PPPoA LLC and PPPoA VC-Mux.
3. If you are instructed to change the VPI or VCI number, type in the correct setting in the available entry fields.
Most users will not need to change these settings. The Internet connection cannot function if these values are
incorrect.
4. Click Next to go to the next window and complete the Setup Wizard.
Using the Setup Wizard - Finish and Restart
Finally you can confirm that the setup process is completed. If you are satisfied that you have entered all the necessary
information correctly, click the Restart button to save the new configuration settings and restart the Router. If you need
to change settings from a previous window, click the Back button.
***Note :Do not turn the Router off while it is restarting. After the Router is finished restarting, you are now ready to continue
to configure the Router as desired. You may want to test the WAN connection by accessing the Internet with your
browser.
------------------------------------------------
DSL-2542B
>>> DSL-2542B Basic Installation/Configuration
1.)Connect to the Router
To configure the WAN connection used by the Router it is first necessary to communicate with the Router through its management interface, which
is HTML-based and can be accessed using a web browser. The easiest way to make sure your computer has the correct IP settings is to configure
it to use the DHCP server in the Router. The next section describes how to change the IP configuration for a computer running a Windows operating
system to be a DHCP client.
1.To access the configuration utility, open a web-browser such as Internet
Explorer and enter the IP address of the router (192.168.1.1).
2.Type “admin” for the User Name and “admin” in the Password field. If
you get a Page Cannot be Displayed error, please refer to the
Troubleshooting section for assistance.
>>>Quick Setup
1.Click the Setup Wizard link in the middle of the top of the window of the
Router’s opening page to launch a series of setup windows.
*** Alternatively, you can tick the Manual Setup check box and click the
desired setting option radio button in the middle of the window. The
manual ADSL connection setup is described later in this manual.
2.OPENING WINDOW
The first window of the Setup Wizard lists the basic steps in the process.
These steps are as follows:
1. Change the Router password.
2. Configure the connection to the Internet.
3. Save the new configuration settings and reboot the system.
3.)CHANGE YOUR ROUTER PASSWORD
This window of the Setup Wizard is used to change the Router password.
D-Link recommends to help secure your network, the user change the
Current Password from the factory default “admin.” The New Password
should be between 1 and 16 alphanumeric characters. Once you have
filled out the fields in this window, including re-typing the new password in
the Confirm Password field, click the Next button to continue.
If you do not want to change the password, click the Skip button to
proceed to the next step.
4.)SELECT THE INTERNET CONNECTION TYPE
Now use the drop-down menus to select the Country, ISP Provider, and
Connection Type used for the Internet connection, and enter VPI and VCI
values if applicable. Your ISP has given this information to you—any
information that is not required for your provider will automatically be
grayed out in this window and subsequent Quick Setup windows.
The Connection Type options are 1483 Bridged IP LLC, 1483 Bridged IP
VC-Mux, 1483 Routed IP LLC, 1483 Routed IP VC-Mux, PPPoE LLC,
PPPoE VC-Mux, PPPoA LLC, and PPPoA VC-Mux.
Click the Next button when you are finished to proceed to the next Setup
Wizard window.
5.)SELECT THE INTERNET CONNECTION TYPE
If the following Setup Wizard window appears, please select the
connection type used by your ISP and then click the Next button. Most
users, however, will be sent directly to a Setup Wizard window for their
specific Internet connection type based on the information entered in the
previous Setup Wizard window.
6.)FINISH & RESTART CONFIRMATION
Finally you can confirm that the setup process is completed. If you are
satisfied that you have entered all the necessary information correctly,
click the Restart button to save the new configuration settings and restart
the Router. If you need to change settings from a previous window, click
the Back button.
7.)REBOOT CONFIRMATION DIALOG
Click the OK button to proceed with the Router reboot.
------------------------------------------------
>>> DSL-2542B Basic Installation/Configuration
Web-based Configuration Utility
Connect to the Router
To configure the WAN connection used by the Router it is first necessary to communicate with the Router through its management interface, which
is HTML-based and can be accessed using a web browser. The easiest way to make sure your computer has the correct IP settings is to configure
it to use the DHCP server in the Router. The next section describes how to change the IP configuration for a computer running a Windows operating
system to be a DHCP client.
1.To access the configuration utility, open a web-browser such as Internet
Explorer and enter the IP address of the router (192.168.1.1).
2.Type “admin” for the User Name and “admin” in the Password field. If
you get a Page Cannot be Displayed error, please refer to the
Troubleshooting section for assistance.
-------------------------------------------
QUICK SETUP
Click the Setup Wizard link in the middle of the top of the window of the
Router’s opening page to launch a series of setup windows.
Alternatively, you can tick the Manual Setup check box and click the
desired setting option radio button in the middle of the window. The
manual ADSL connection setup is described later in this manual.
QUICK SETUP – OPENING WINDOW
The first window of the Setup Wizard lists the basic steps in the process.
These steps are as follows:
1. Change the Router password.
2. Configure the connection to the Internet.
3. Save the new configuration settings and reboot the system.
QUICK SETUP – CHANGE YOUR ROUTER PASSWORD
This window of the Setup Wizard is used to change the Router password.
D-Link recommends to help secure your network, the user change the
Current Password from the factory default “admin.” The New Password
should be between 1 and 16 alphanumeric characters. Once you have
filled out the fields in this window, including re-typing the new password in
the Confirm Password field, click the Next button to continue.
If you do not want to change the password, click the Skip button to
proceed to the next step.
QUICK SETUP – SELECT THE INTERNET CONNECTION TYPE
Now use the drop-down menus to select the Country, ISP Provider, and
Connection Type used for the Internet connection, and enter VPI and VCI
values if applicable. Your ISP has given this information to you—any
information that is not required for your provider will automatically be
grayed out in this window and subsequent Quick Setup windows.
The Connection Type options are 1483 Bridged IP LLC, 1483 Bridged IP
VC-Mux, 1483 Routed IP LLC, 1483 Routed IP VC-Mux, PPPoE LLC,
PPPoE VC-Mux, PPPoA LLC, and PPPoA VC-Mux.
Click the Next button when you are finished to proceed to the next Setup
Wizard window.
QUICK SETUP – SELECT THE INTERNET CONNECTION TYPE
If the following Setup Wizard window appears, please select the
connection type used by your ISP and then click the Next button. Most
users, however, will be sent directly to a Setup Wizard window for their
specific Internet connection type based on the information entered in the
previous Setup Wizard window.
QUICK SETUP – PPPOE/PPPOA CONFIGURATION
Type in the User Name and Password used to identify and verify your
account to the ISP. If you are instructed to change the VPI or VCI number,
type in the correct setting in the available entry fields. Most users will not
need to change these settings. The Internet connection cannot function if
these values are incorrect.
Some users may have to adjust the Connection Type from the drop-down
menu at the bottom of this Setup Wizard window. The available
connection and encapsulation types are PPPoE LLC, PPoE VC-Mux,
PPPoA LLC, and PPPoA VC-Mux.
Click Next to go to the last Setup Wizard window.
QUICK SETUP – FINISH & RESTART CONFIRMATION
Finally you can confirm that the setup process is completed. If you are
satisfied that you have entered all the necessary information correctly,
click the Restart button to save the new configuration settings and restart
the Router. If you need to change settings from a previous window, click
the Back button.
QUICK SETUP – REBOOT CONFIRMATION DIALOG
Click the OK button to proceed with the Router reboot.
QUICK SETUP – REBOOT TIME INDICATOR
The following window opens to indicate the amount of time it will take to
reboot the Router.
QUICK SETUP – REBOOT CONFIRMATION DIALOG
Click OK to continue.
-----------------------------------------------
PPPoE/PPPoA
To configure a PPPoE or PPPoA type WAN connection, follow these
steps:
1. Type the Username and Password used for your ADSL account. A
typical User Name will be in the form “user1234@isp.co.uk.” The
Password may be assigned to you by your ISP or you may have
selected it when you set up the account with your ISP. The Service
Name field is used for the name of your Internet Service Provider.
This is optional.
2. Choose the Connection Type from the drop-down menu. This
defines both the connection protocol and encapsulation method
used for your ADSL service. The available options are PPPoE LLC,
PPPoE VC-Mux, PPPoA LLC and PPPoA VC-Mux. If you have not
been provided specific information for the Connection Type setting,
leave the default setting.
3. Leave the MTU value at the default setting unless you have
specific reasons to change this.
4. Some users will want to set an Idle Time Out. This is an age-out
value, in minutes, before the Router times out.
5. If you are instructed to change the VPI or VCI values, type in the
values assigned for your account.
6. When you are satisfied that all the WAN settings are configured
correctly, click the Apply Settings button. This will save the
settings and reboot the Router to let your changes take effect.
7. Upon restarting, the Router should automatically establish the
WAN connection. If it does not, click the Connect button at the
bottom of this window.
------------------------------------------------
>>> DSL-2542B NAT, Port Triggering,DMZ Host description
NAT
To access the Network Address Translation (NAT) Setup window, click the NAT button in the Advanced Setup directory. The NAT button
appears when configuring WAN interface in PPPoA, PPPoE, MER or IPoA.
Virtual Servers
This window is used to configure virtual server. You can add, delete, and
modify virtual server on this window.
If you are setting up the virtual server, click the Add button.
You can configure the service settings on this window by clicking the
Select a Service radio button and then using the drop-down list to choose
an existing service, or by clicking the Custom Server radio button and
entering your own Application Rule in the field provided.
Click Save/Apply when you are finished with the virtual server
configuration.
Port Triggering
Some applications require that the remote parties open specific ports in
the Router’s firewall for access. Port Trigger dynamically opens the Open
Ports in the firewall when an application on the LAN initiates a TCP/UDP
connection to a remote party using Trigger Ports. The Router allows the
remote party form the WAN side to establish new connections back to the
application on the LAN side using the Open Ports.
Applications such as games, video conferencing, and other remote
access applications require that specific ports in the Router’s firewall be
opened for access by applications.
Click the Add button to configure port triggering.
You can configure the port settings on this window by clicking the Select
an application radio button and then using the drop-down list to choose
an existing application, or by clicking the Custom application radio
button and entering your own Application Rule in the field provided.
Click Save/Apply when you are finished with the port setting
configuration. The new Application Rule will appear in the Port Triggering
table.
DMZ Host
Since some applications are not compatible with NAT, the Router supports
use of a DMZ IP address for a single host on the LAN. This IP address is
not protected by NAT and will therefore be visible to agents on the Internet
with the right type of software. Keep in mind that any client PC in the DMZ
will be exposed to various types of security risks. If you use the DMZ, take
measures (such as client-based virus protection) to protect the remaining
client PCs on your LAN from possible contamination through the DMZ.
To designate a DMZ IP address, type in the IP Address of the server or
device on your LAN, and click the Save/Apply button.
------------------------------------------------
สมัครสมาชิก:
บทความ (Atom)